
 RQPro2.0 本地环境与 VScode 集成
# RQPro2.0 本地环境与 VScode 集成
RQPro2.0 与 VS code 的集成
# 安装 Python Extensions
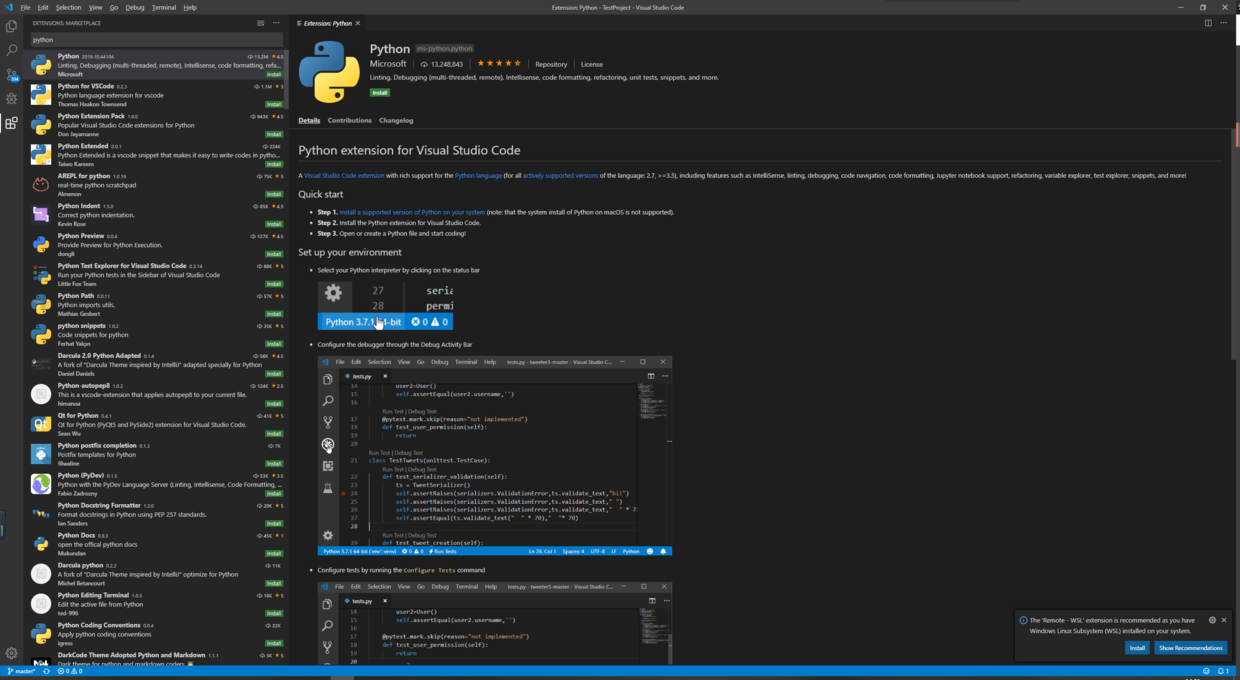
- 点击
install安装 - 安装后重启 VS code
# 获取 rqpro python 环境路径
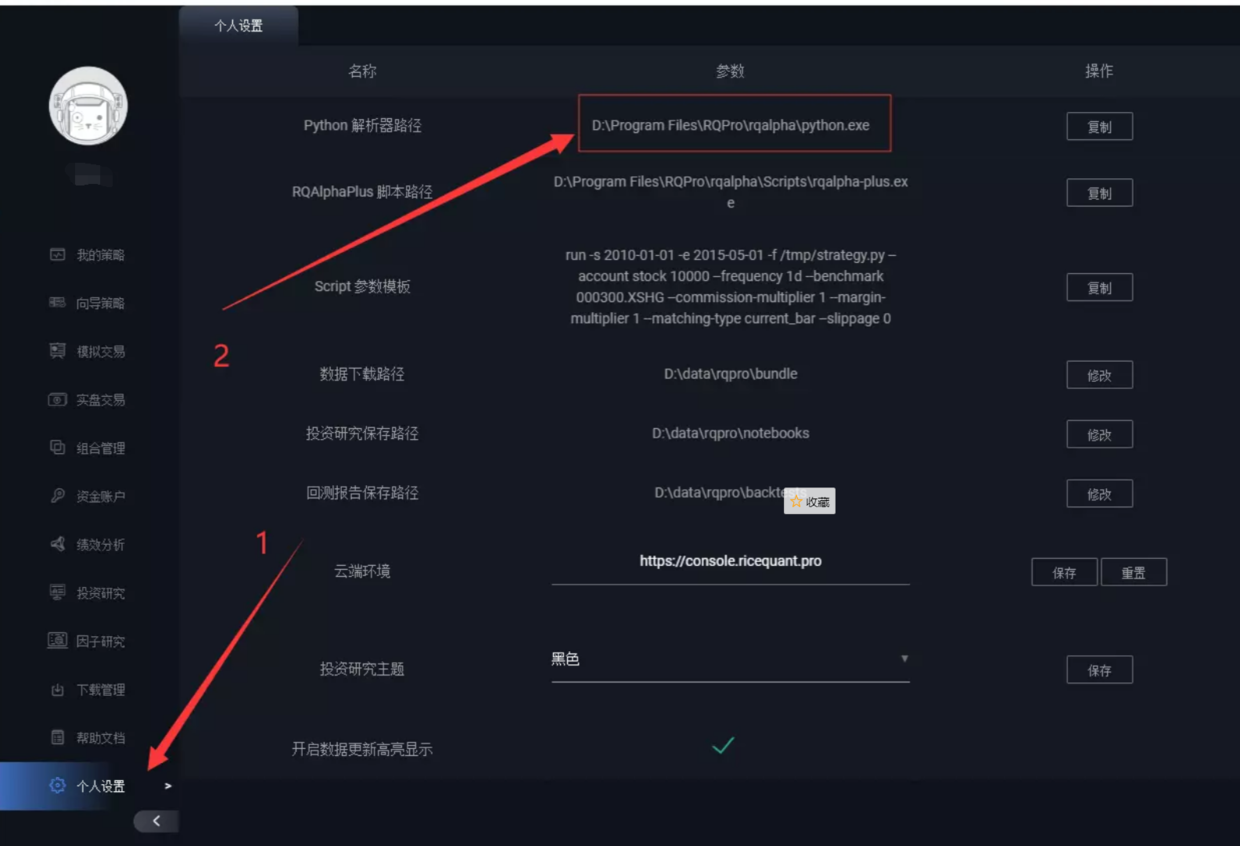
本机的 rqalpha python 环境路径为 D:\Program Files\RQPro\rqalpha\python.exe
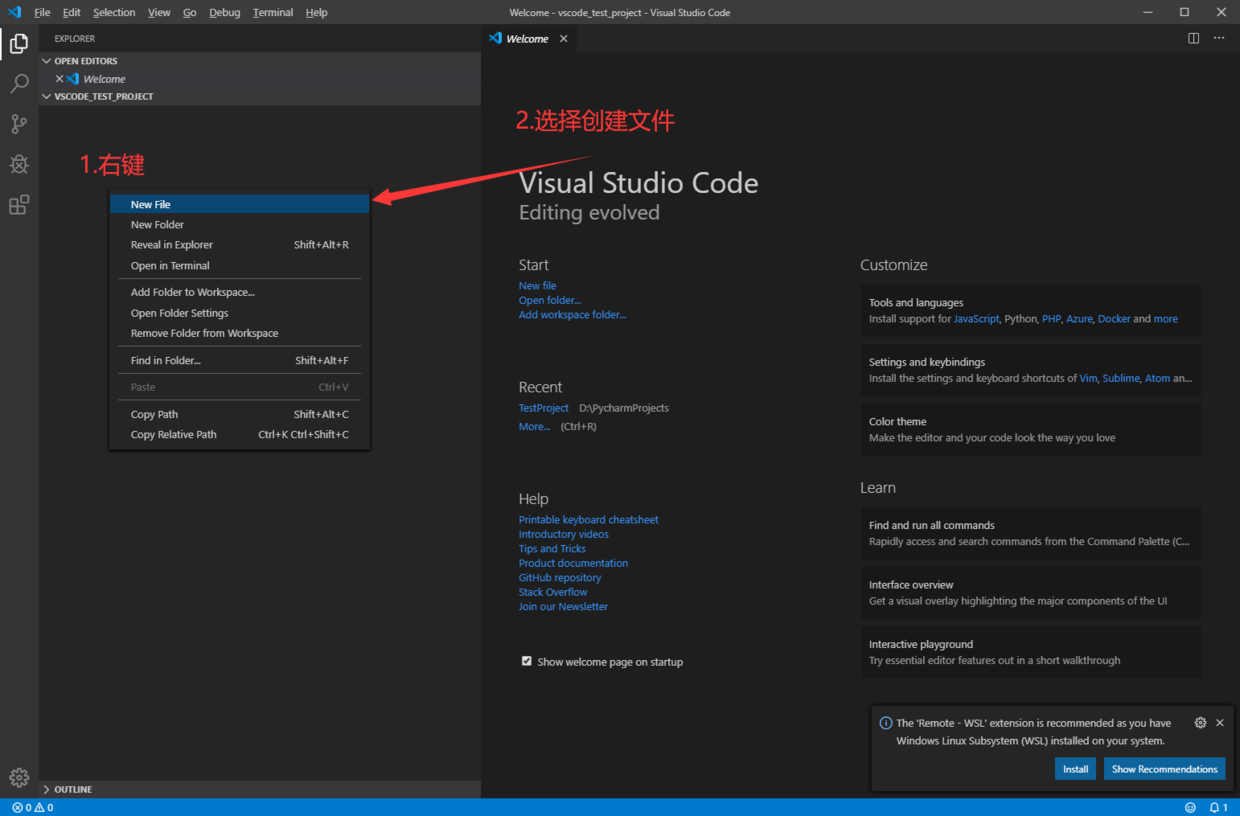
# 新建项目
- 新建一个文件夹
- 将文件夹拖入到 VS code 窗口
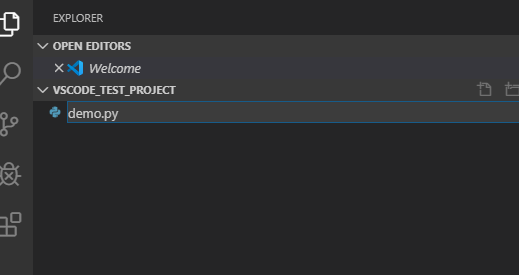
- 创建一个。py 文件
# 配置 python 环境
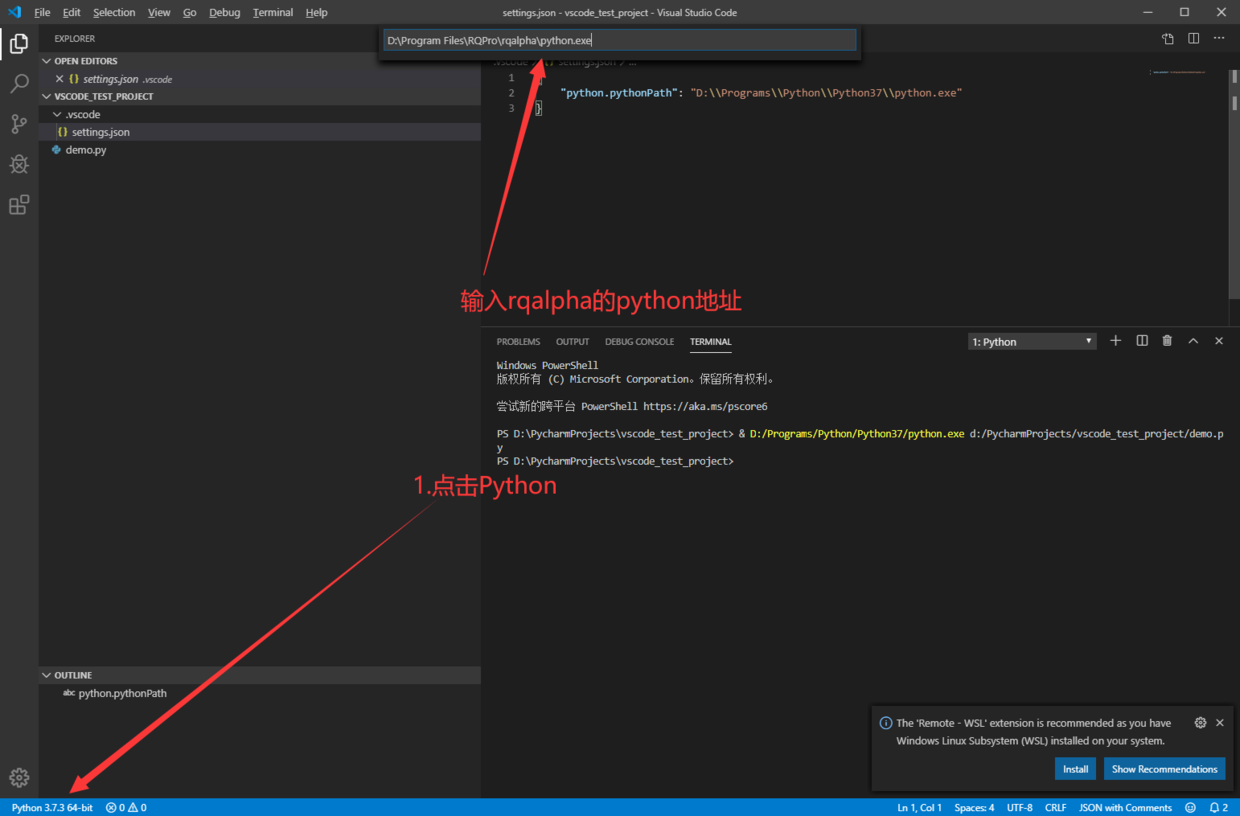
# 如果不能选择此 python
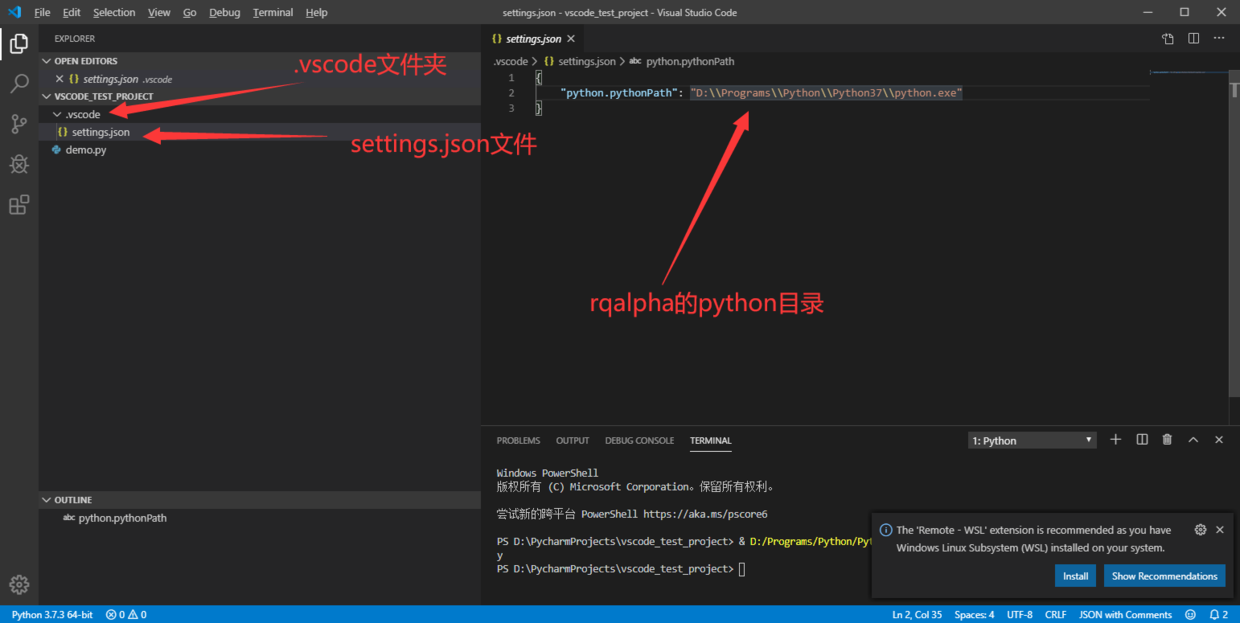
需要做如下修改
- 选择项目文件夹下
.vscode文件夹下 settings.json 文件 (没有文件或文件夹则创建) - 将"python.pythonPath"的值改为 python.exe 路径(注意双反斜杠转义)
# 使用 rqdatac 与 rqfactor
输入下列代码
#!/usr/bin/python3
# encoding: utf-8
import pandas as pd
import rqdatac
import rqfactor
from rqfactor.execute.engine_data_source import FactorEngineDataSource
from rqfactor.engine import FactorExecutionEngine

rqdatac.init()  # 需要账号密码 请参照 rqdata 文档
data_source_path = r'D:\data\rqpro\bundle'  # RQPro2.0 - 个人设置 - 数据下载路径

_engine_data_source = FactorEngineDataSource(data_source_path)
engine = FactorExecutionEngine(_engine_data_source)
factor = rqfactor.Factor('close')
order_book_ids = rqdatac.index_components('000300.XSHG')
end_date = pd.Timestamp('20190910')
result = engine.get_multiple(factor, order_book_ids, end_date, 1)
print(result.all())

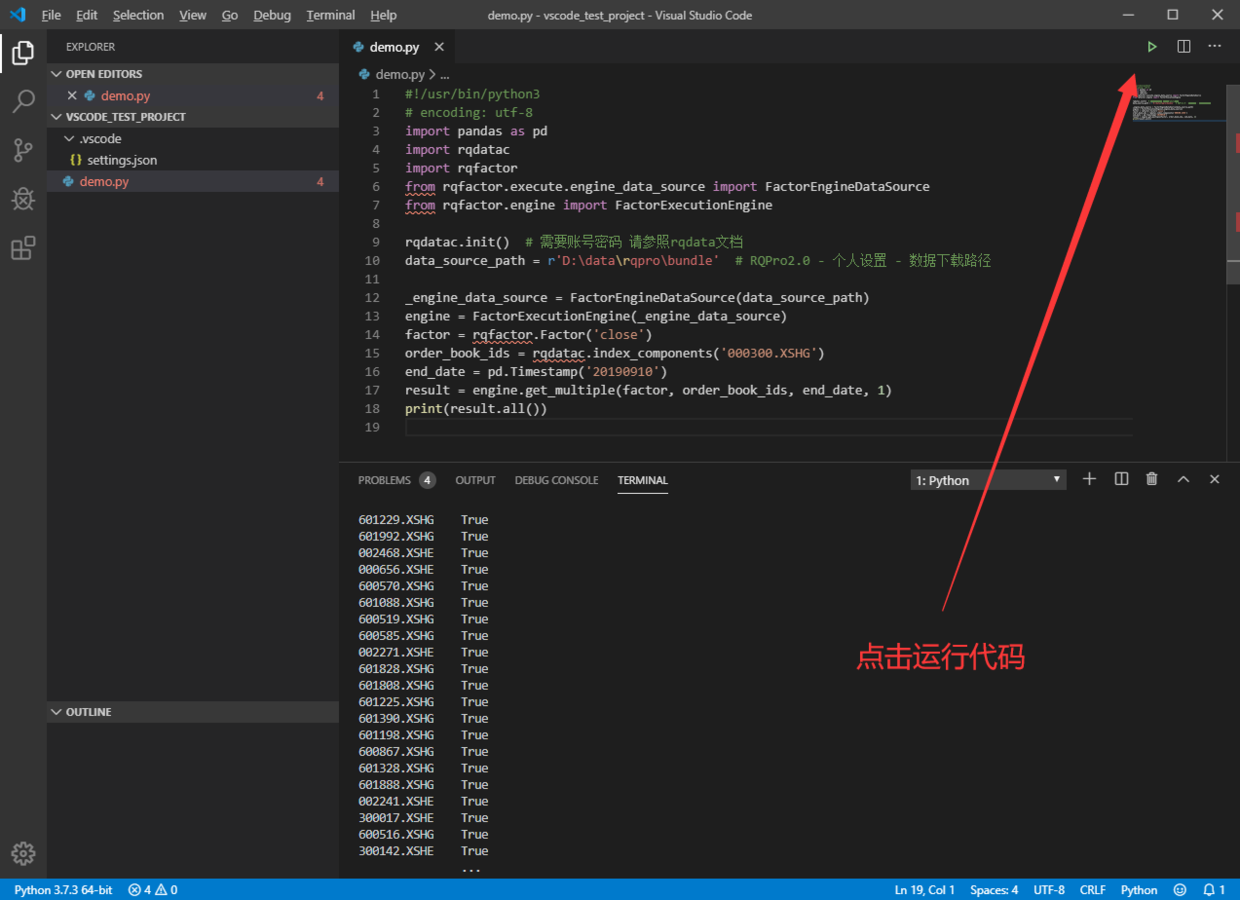
点击右上角绿色三角形运行 python 代码
1
2
3
4
5
6
7
8
9
10
11
12
13
14
15
16
17
18
19
20
2
3
4
5
6
7
8
9
10
11
12
13
14
15
16
17
18
19
20
# 运行 RQAalpha 回测
在 .vscode文件夹下 launch.json中输入如下代码:
{
    // Use IntelliSense to learn about possible attributes.
    // Hover to view descriptions of existing attributes.
    // For more information, visit: https://go.microsoft.com/fwlink/?linkid=830387
    "version": "0.2.0",
    "configurations": [
        {
            "name": "rqalpha_plus",
            "type": "python",
            "request": "launch",
            "module": "rqalpha_plus",
            "args": [
                "run", "-s", "2015-03-01", "-e", "2015-05-01",
                "-f", "${file}",
                "--account", "stock", "10000", "--frequency", "1d", "--benchmark", "000300.XSHG",
                "--commission-multiplier", "1", "--margin-multiplier", "1", "--matching-type", "current_bar", "--slippage", "0"
            ],
            "env": {"PYTHONIOENCODING": "utf-8"}
        }
    ]
}
1
2
3
4
5
6
7
8
9
10
11
12
13
14
15
16
17
18
19
20
21
2
3
4
5
6
7
8
9
10
11
12
13
14
15
16
17
18
19
20
21
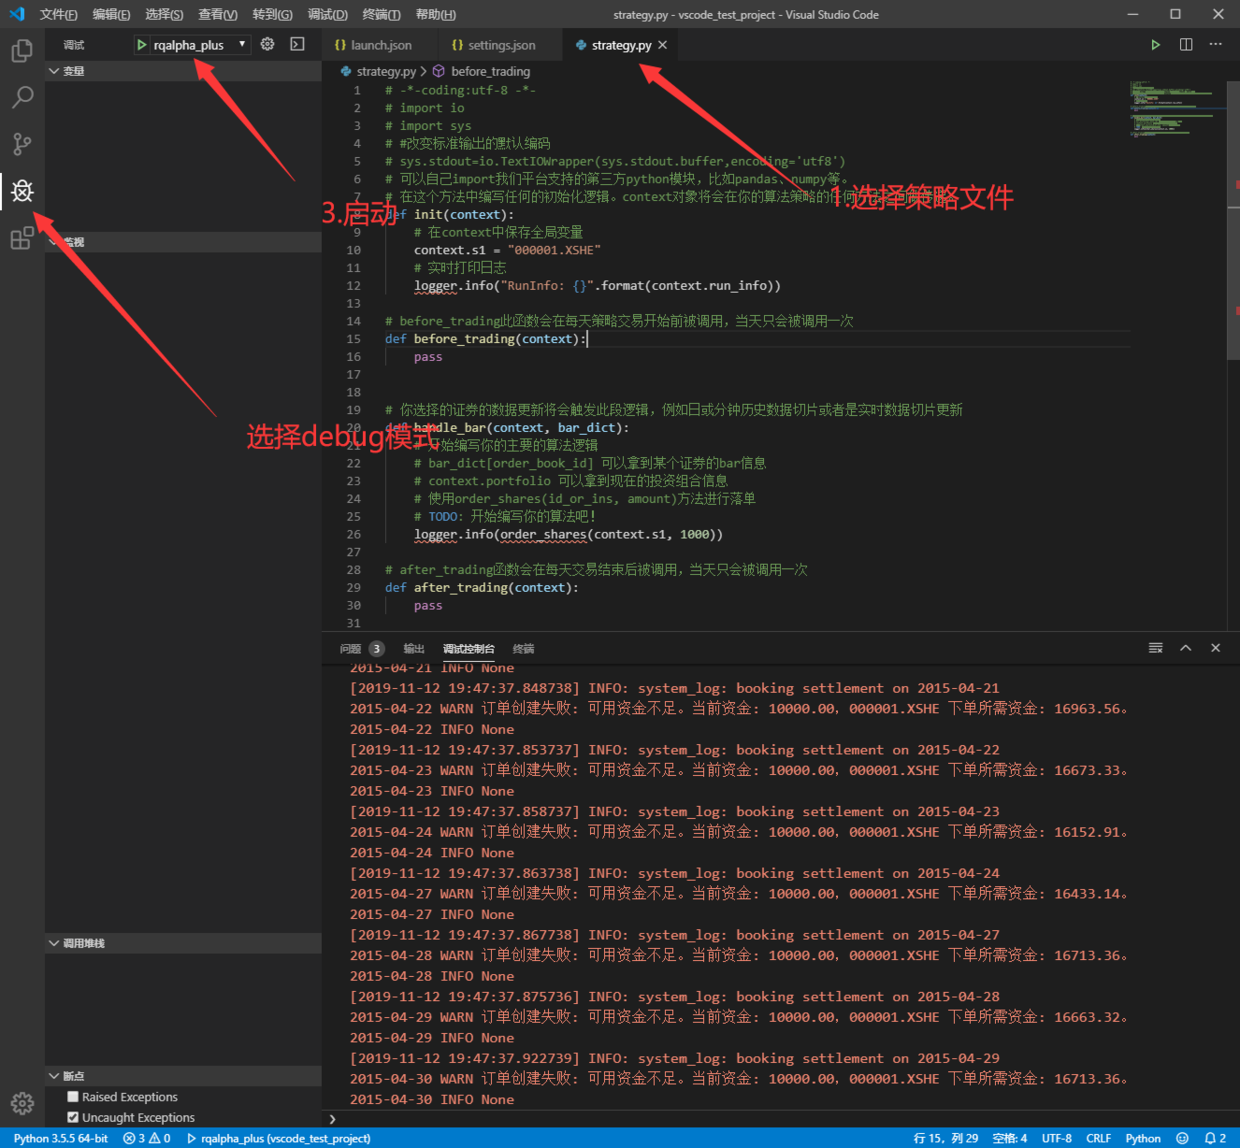
- 选择策略文件 使用 debug 模式运行
编辑 (opens new window)
上次更新: 2024-01-10 16:01:00